Light umbrella
Have you ever thought that we would be able to draw with the help of an umbrella? I'll freely admit I didn't, but as soon as I saw it, I had to have it.
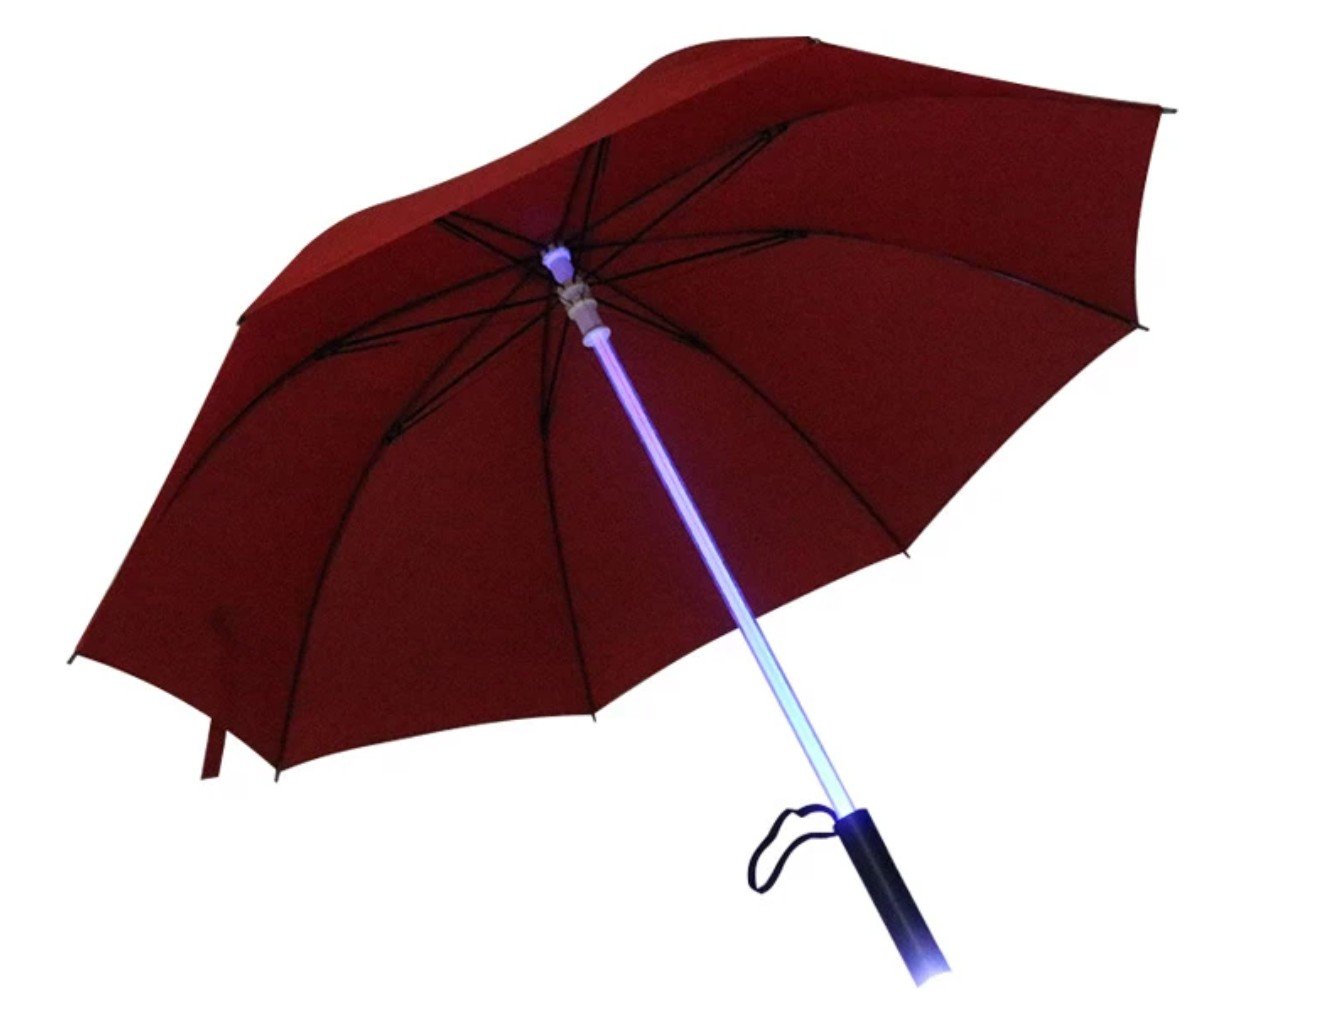
This tool sells really like an umbrella on Aliexpress for a price in the $12 to $18 range and a couple of weeks wait. It has a purely practical use in the rain - of course we won't get wet, plus it has a white LED in the bottom of the handle so we can shine it under our feet. The whole pole, which tends to be metal on conventional umbrellas, is made of surprisingly strong plastic here, and there are grooves inside that diffuse the light from the LEDs that come out of the handle. There are several versions on the market - some can only do 6 colours and 2 flashing modes, some can do 7 colours and 1 flashing mode.

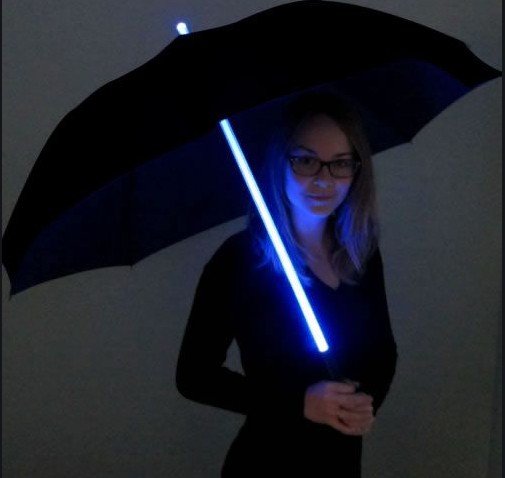
For the purpose of drawing with light, you must first dismantle the umbrella part, as we won't need that. It's all held on by one nail at the top. Of course, disassembling it will damage the umbrella part, rendering it unusable. But we're all about the rest of the umbrella, the result looks like a lightsaber.
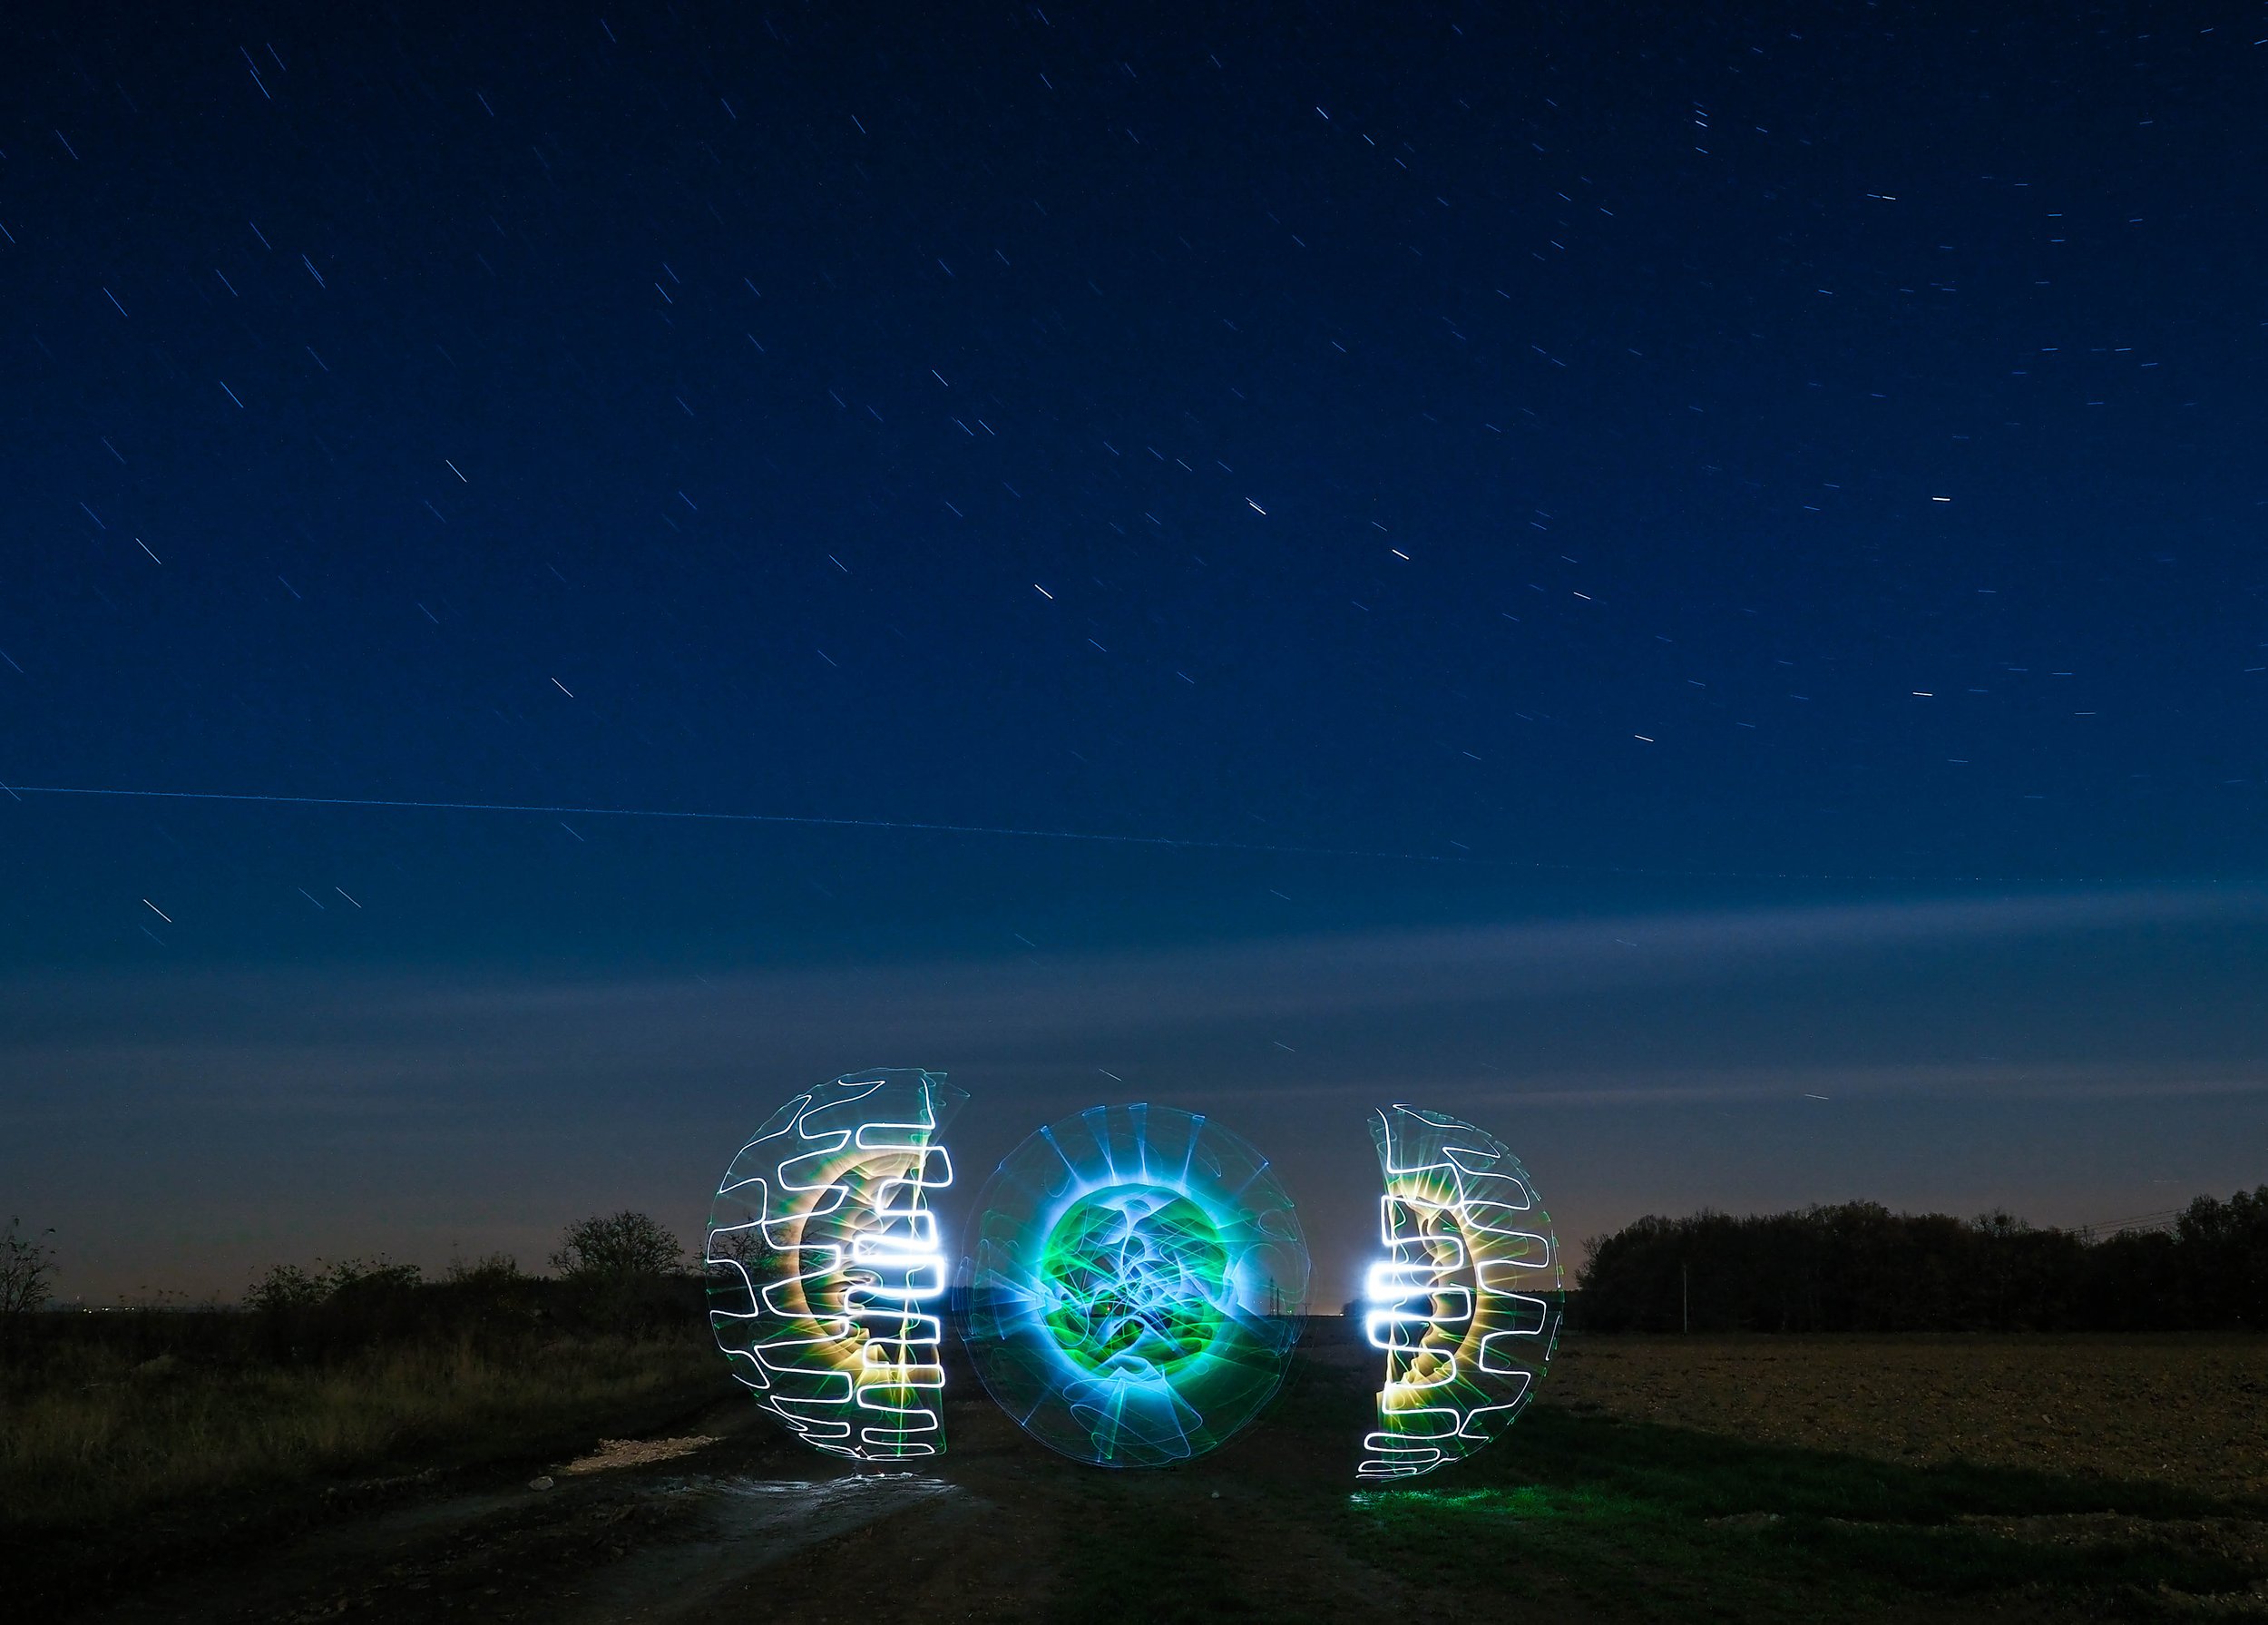
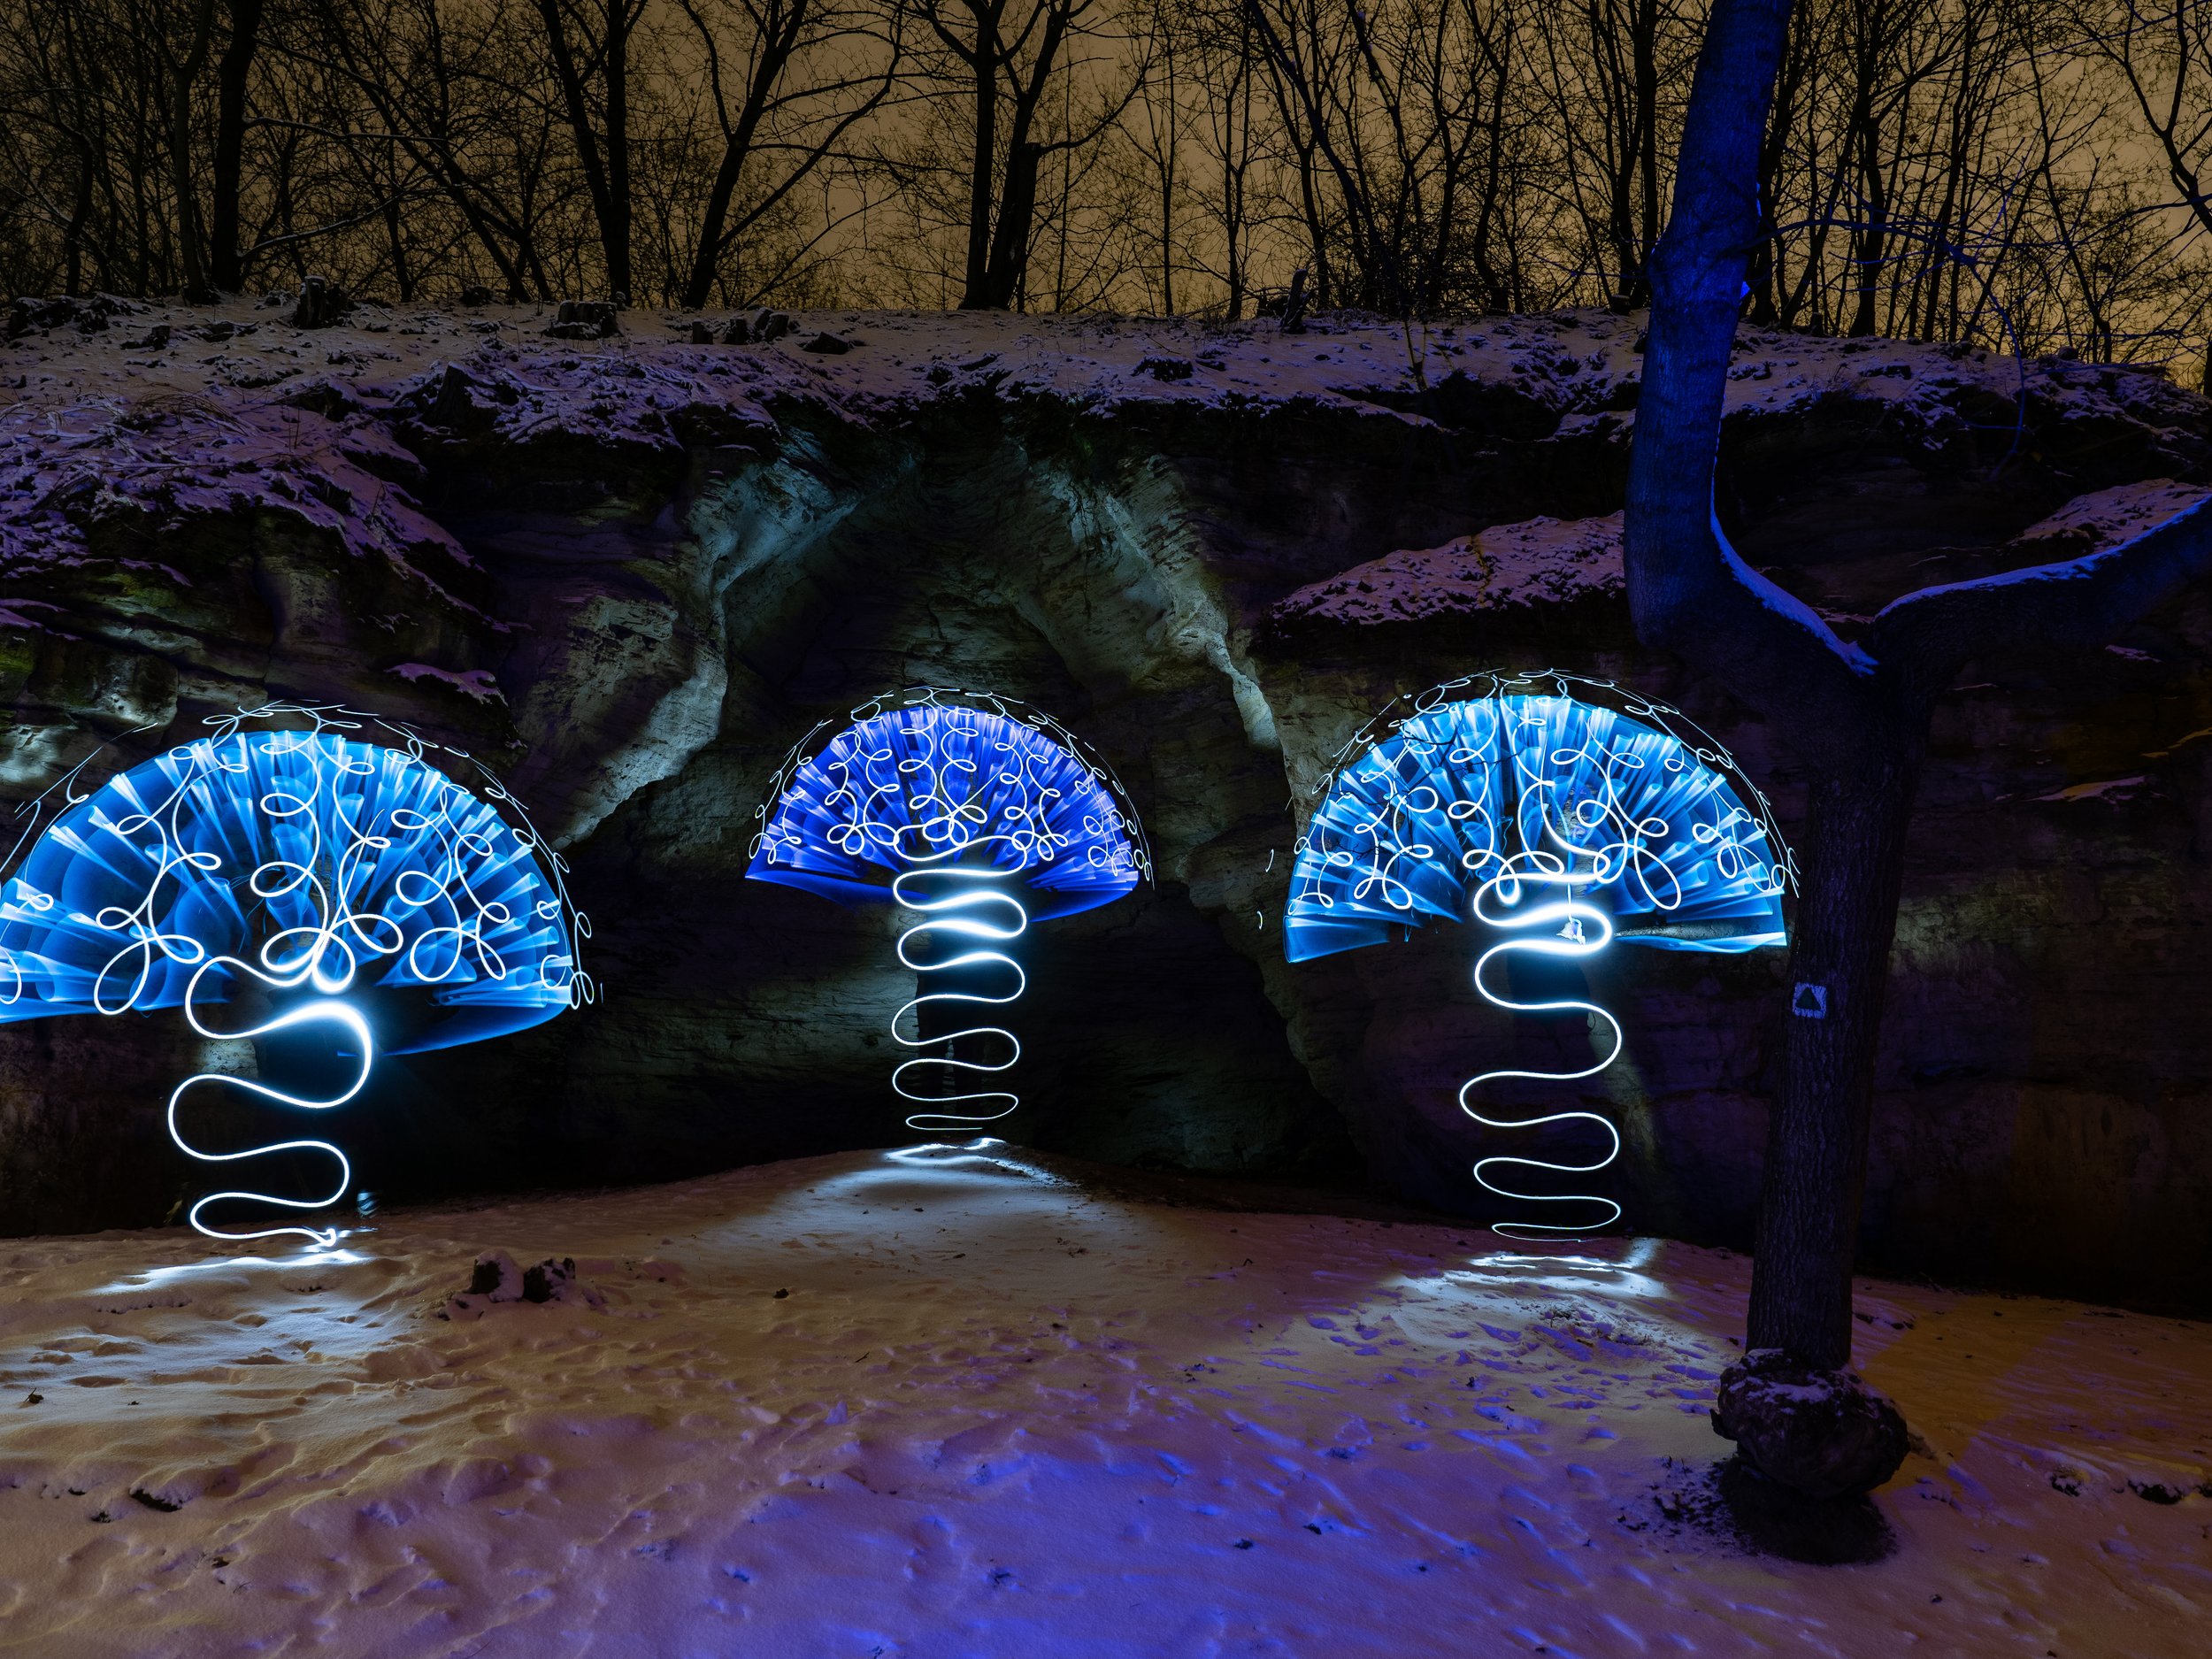
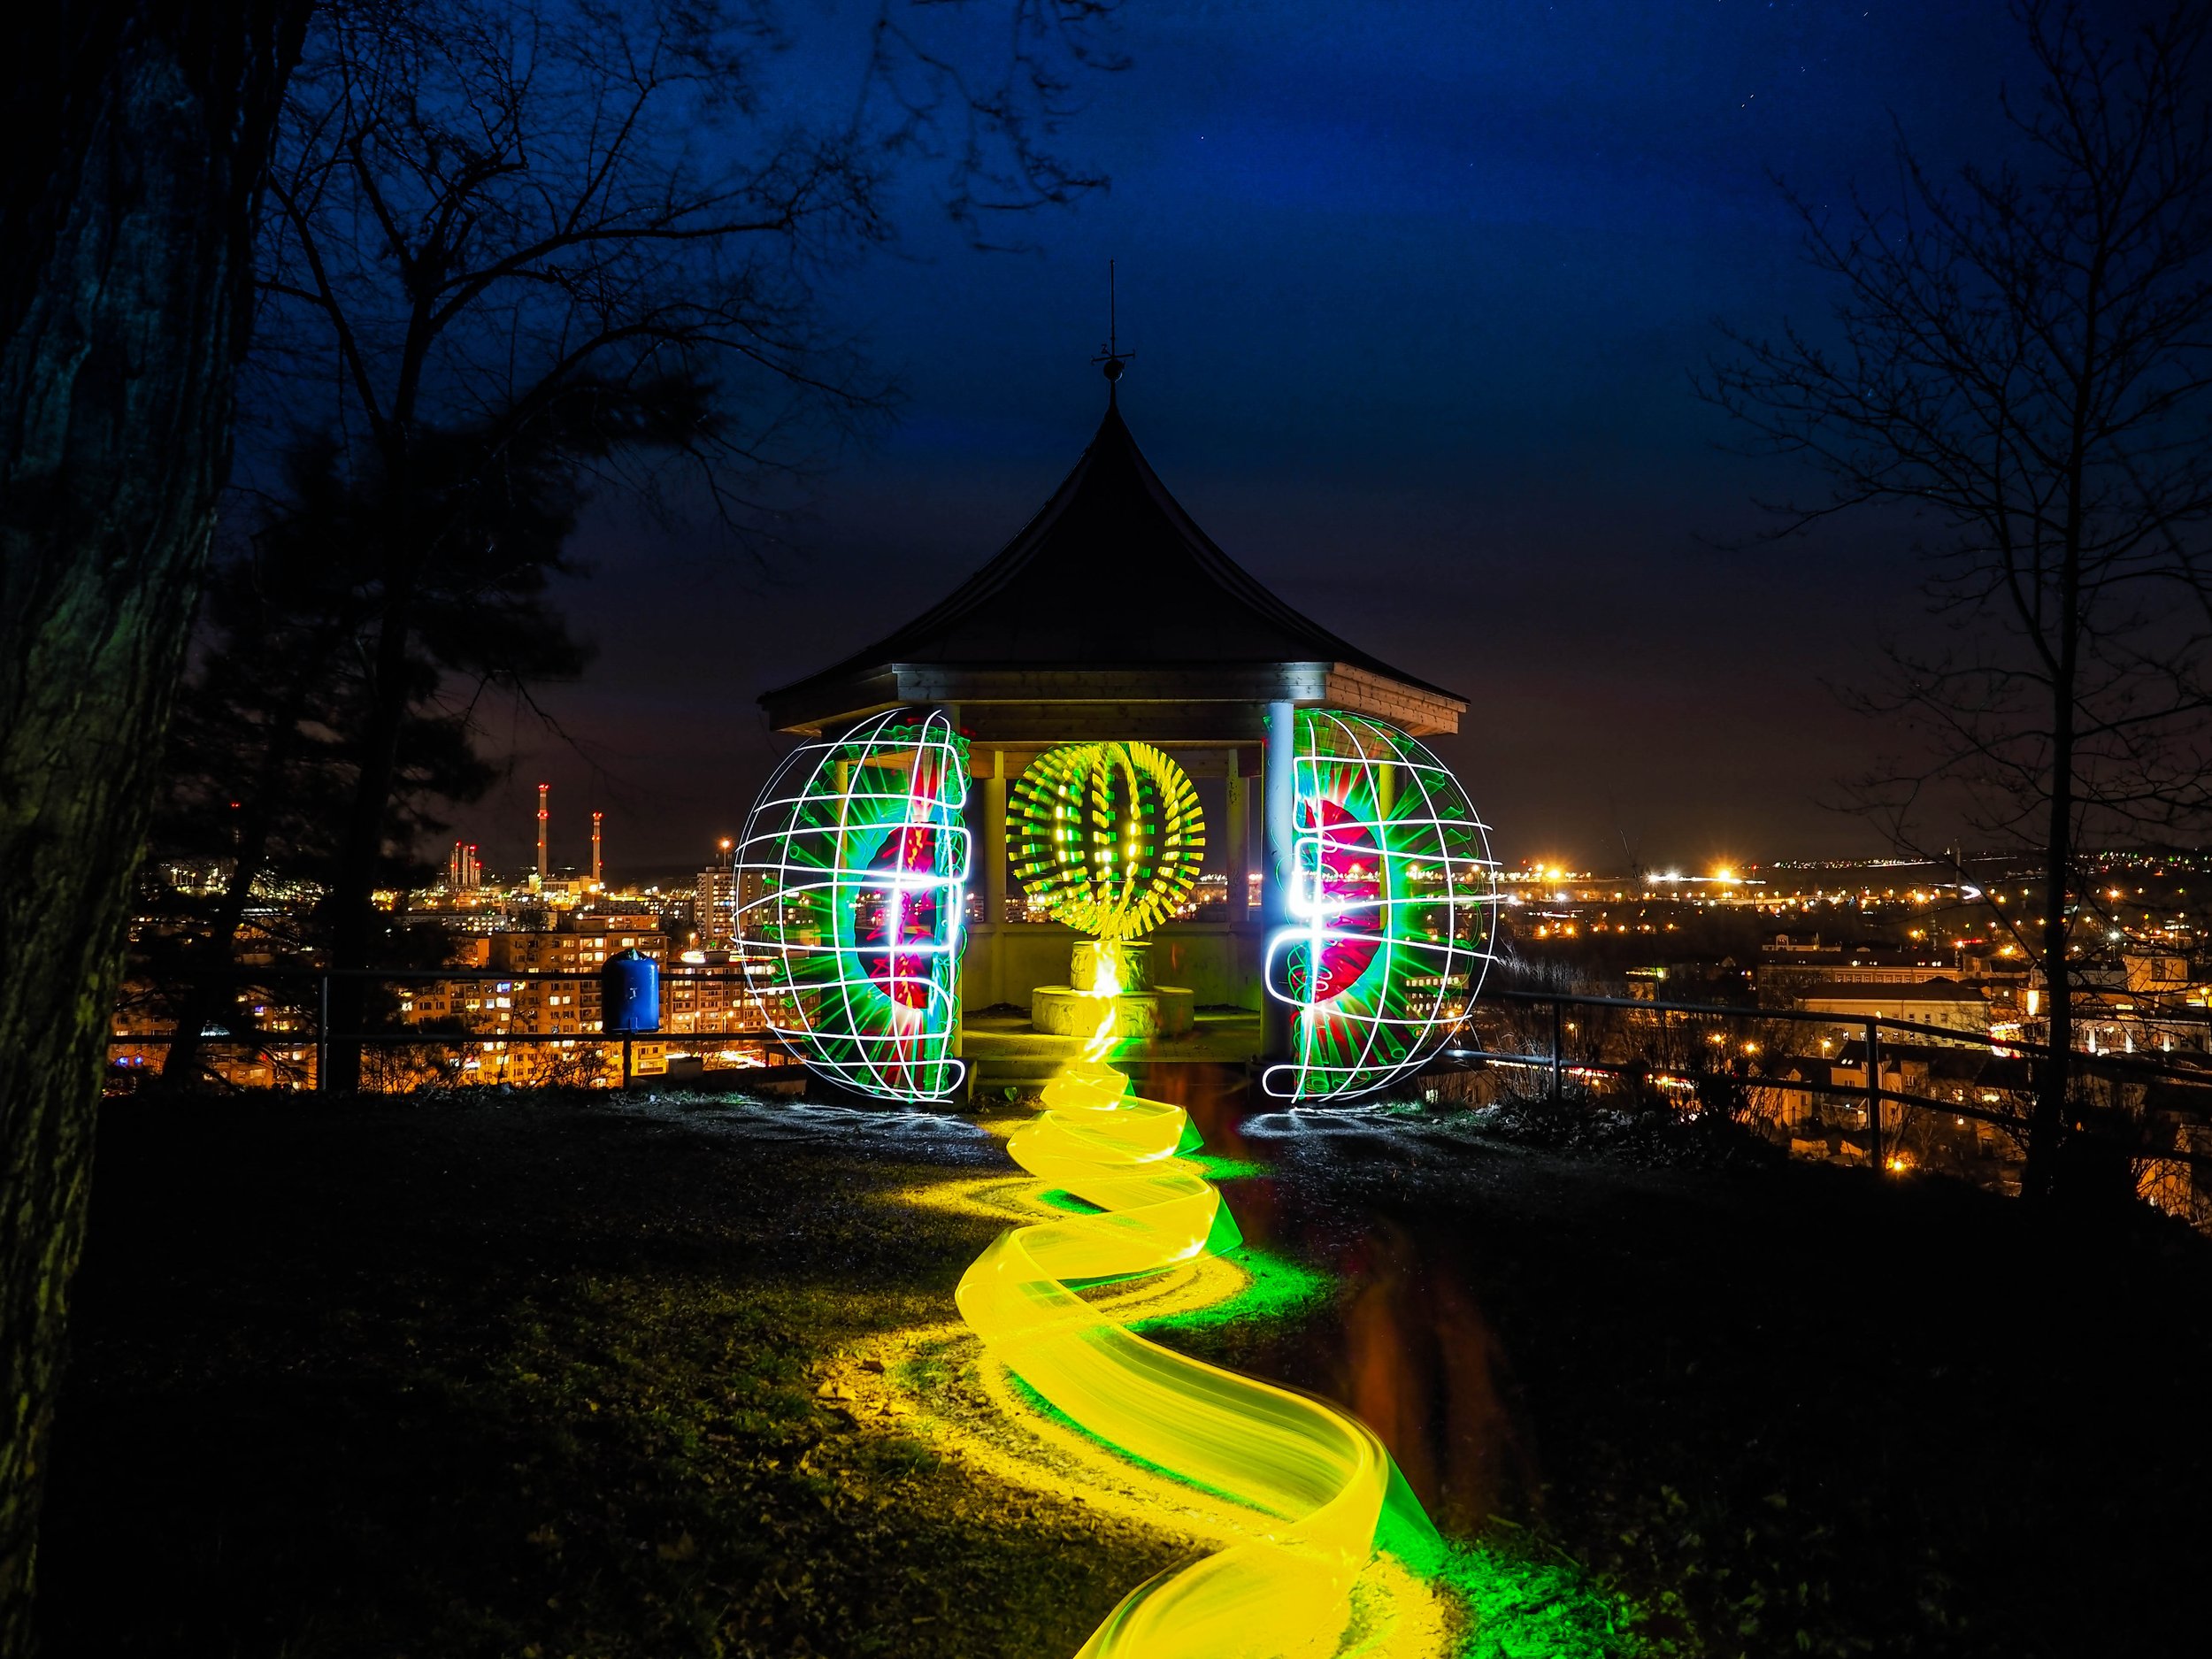
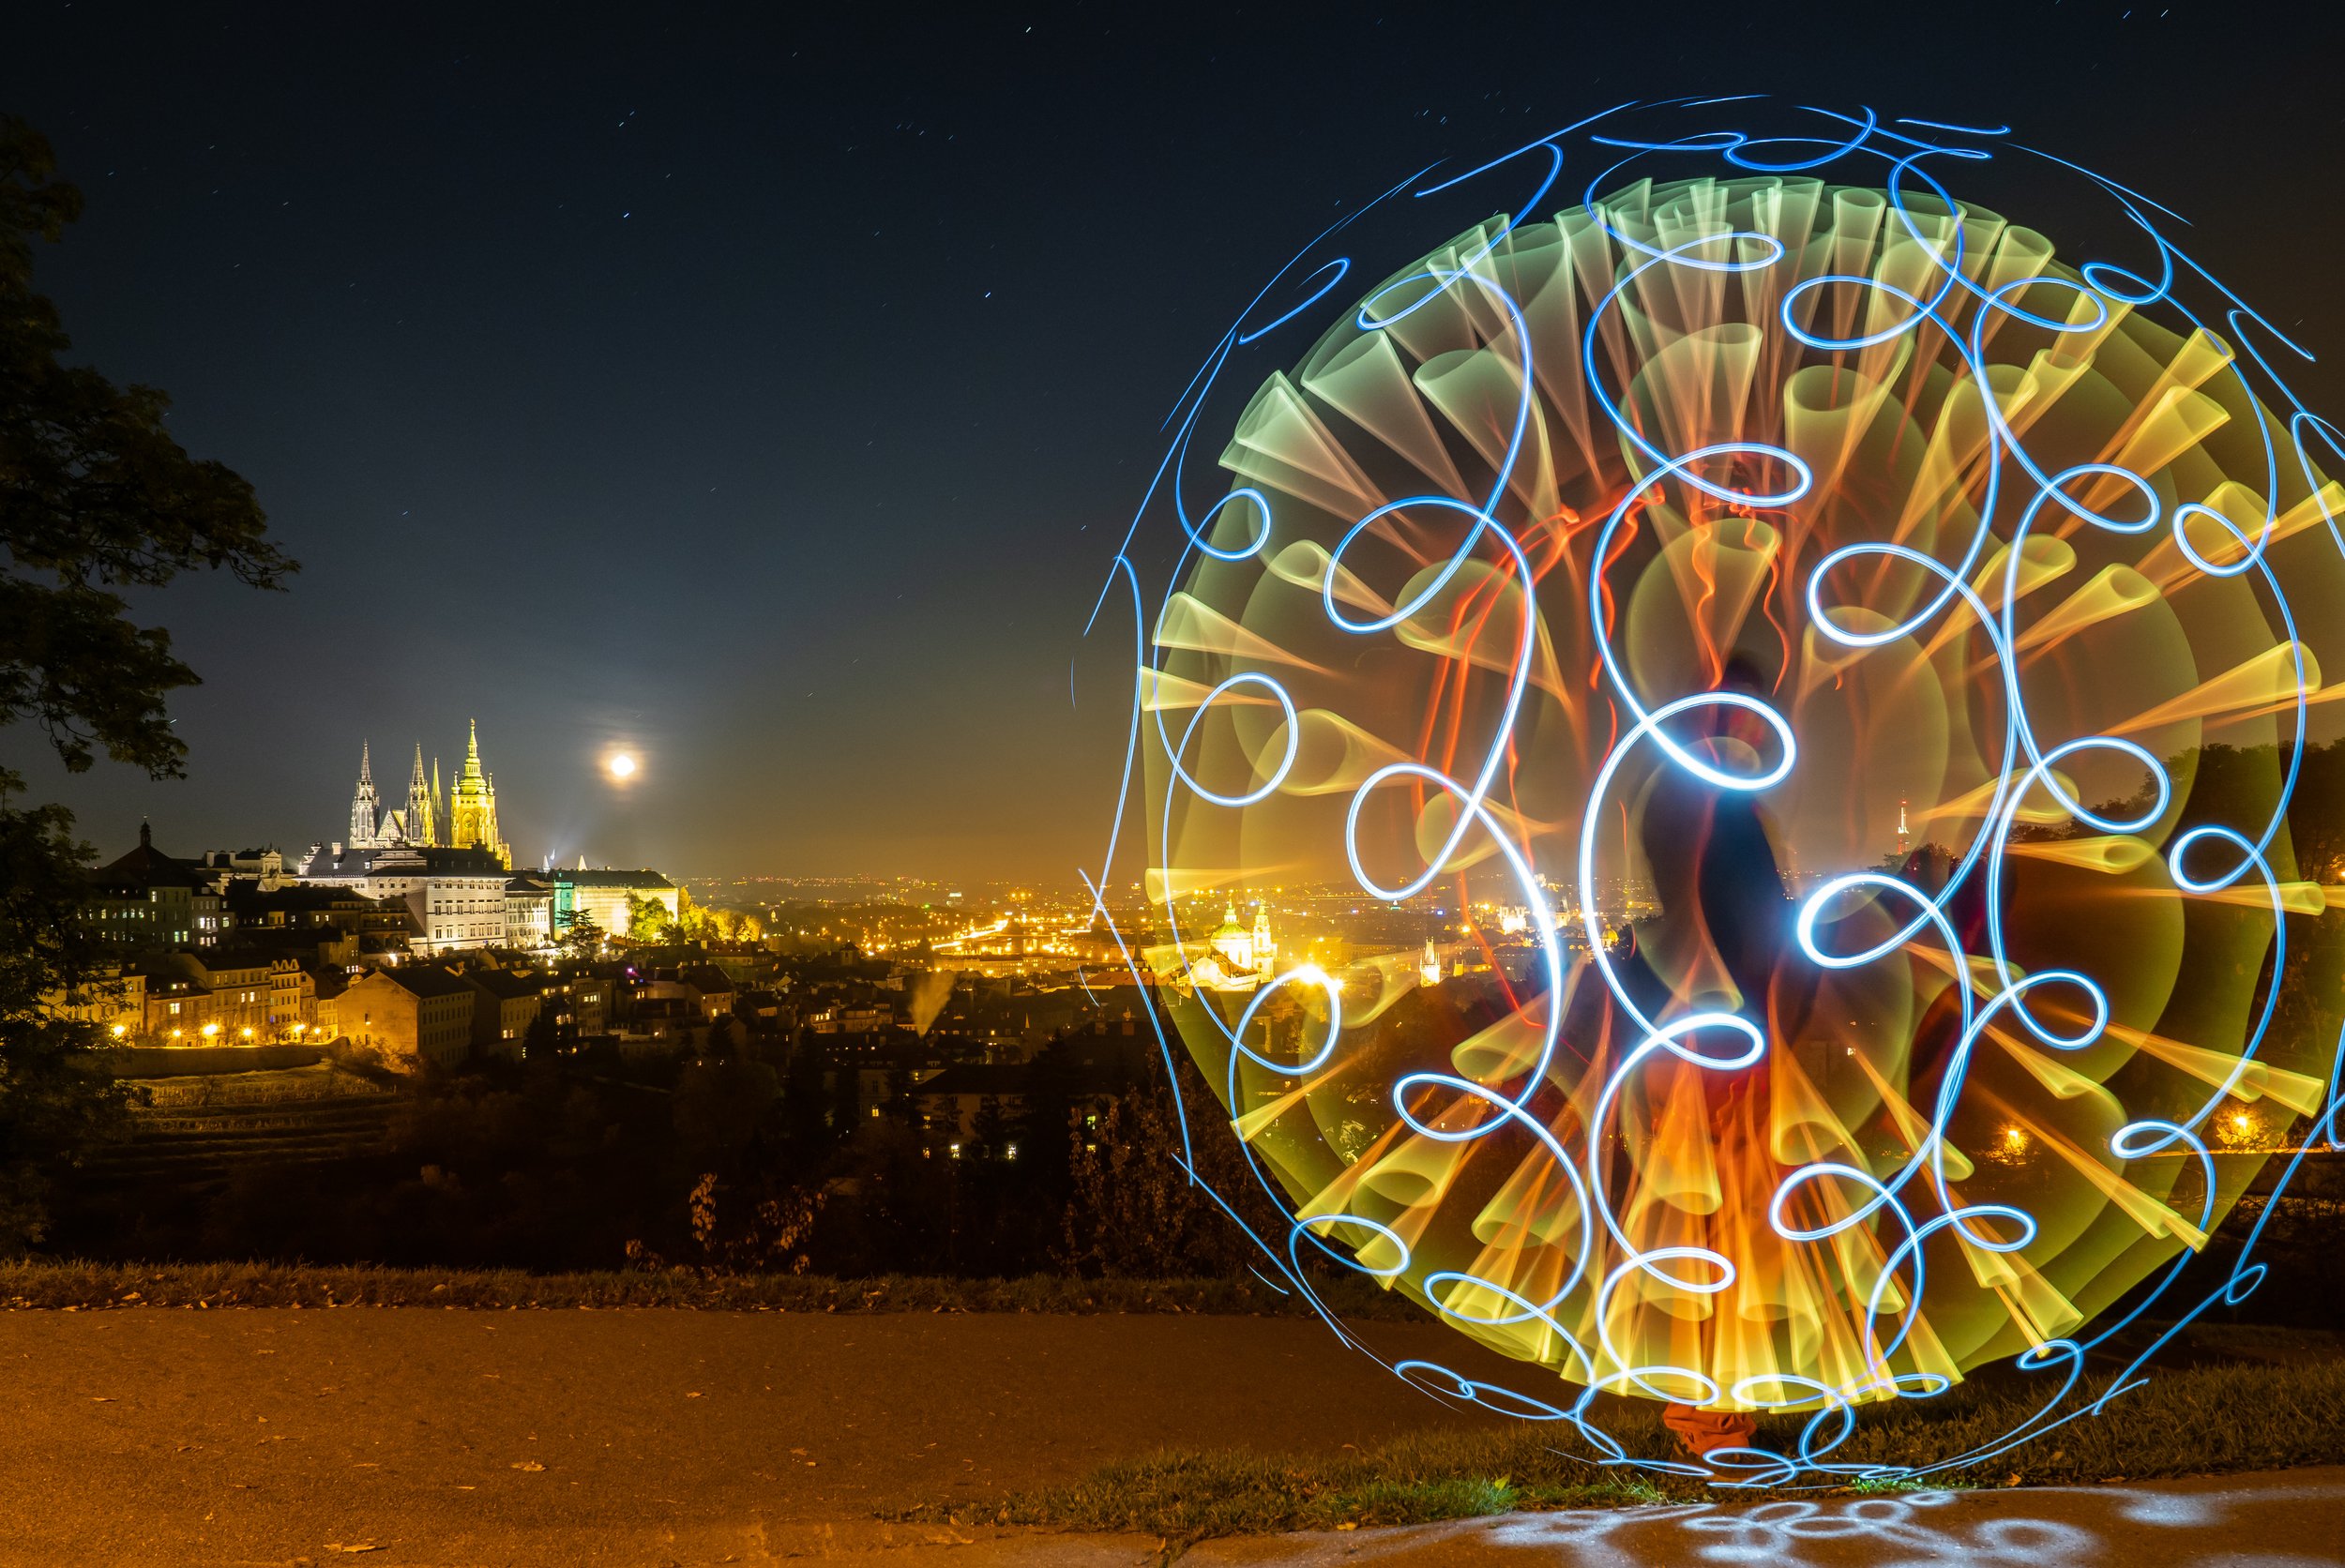
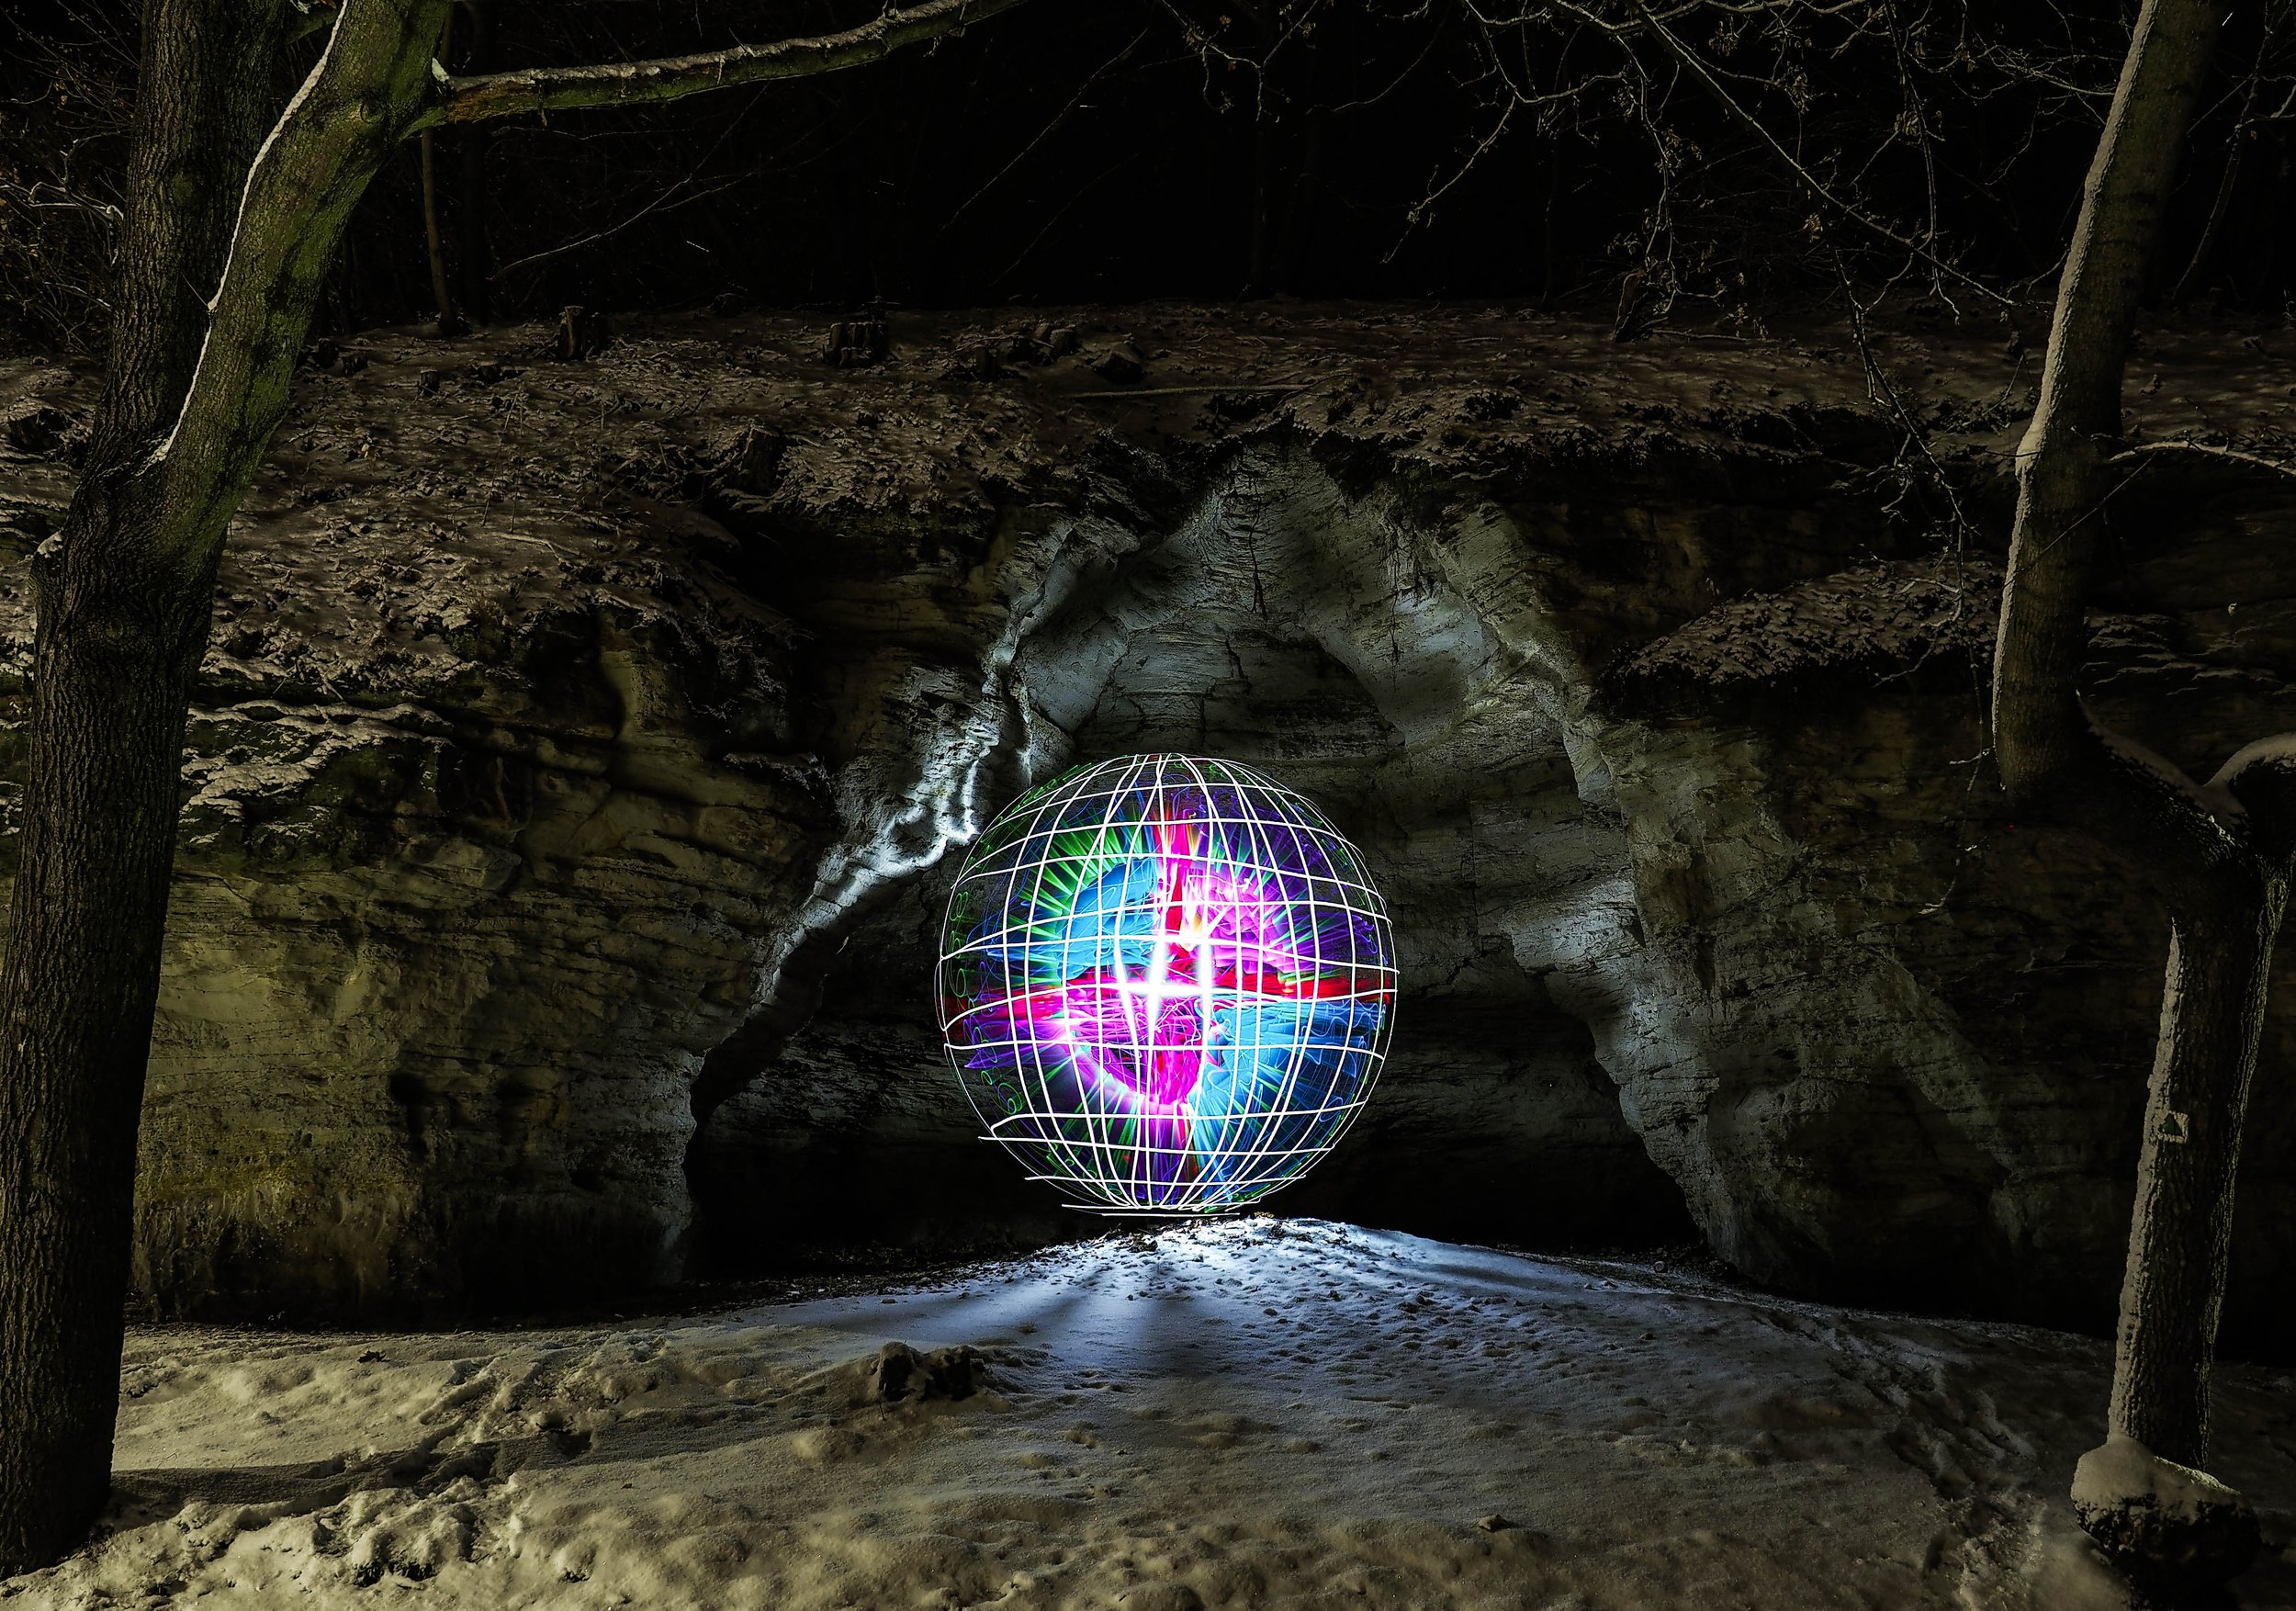
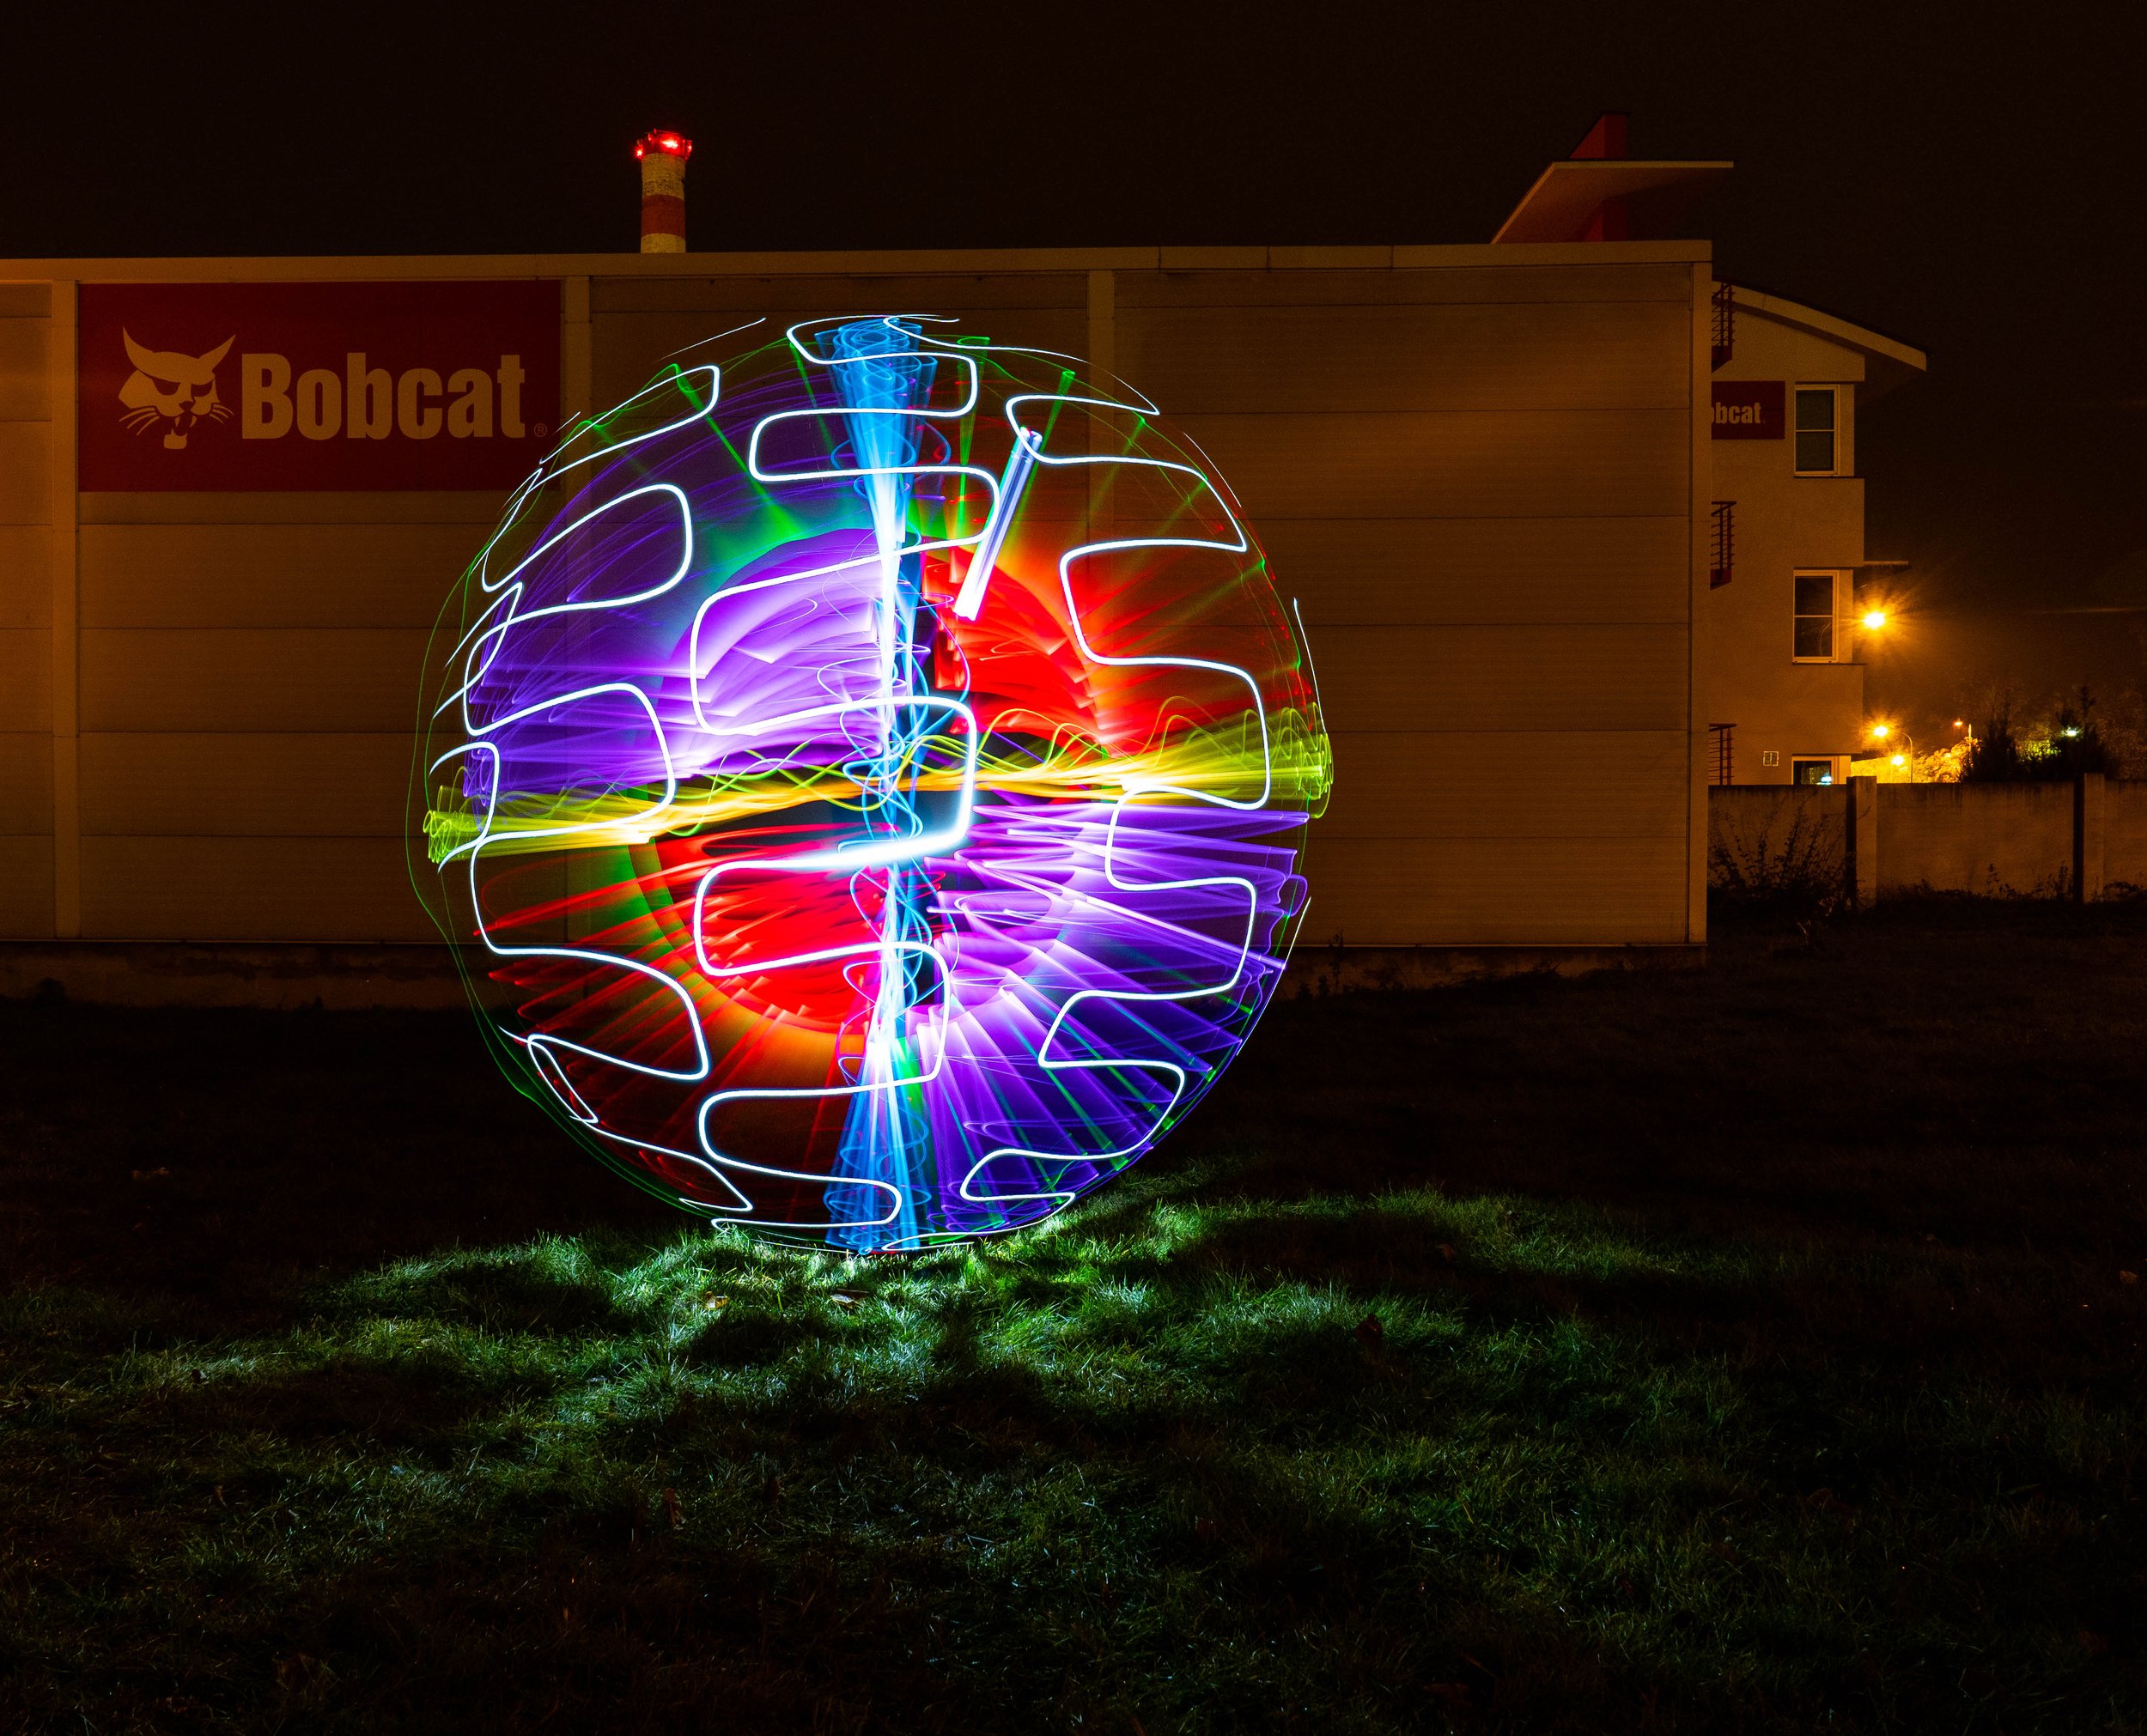
Since the light from this tool is not that pronounced, it is especially suitable for places where it is more dark. It's not entirely suitable for the city in illuminated streets, as the resulting effect fades/blends in with the surroundings. Basic, nice and effective techniques include the creation of Orb. We have already created Orb using Orbtool or a handheld flashlight on a string. The light umbrella allows us to create the orb again a little differently, while keeping the 3D effect and adding a few extra effects.

To create an orb with a white border, we must first light the umbrella - the white light on the handle and the colored bar itself. We then grab the end of the pole, i.e. not the handle, but the opposite end. In the starting position we stand perpendicular to the camera, holding the umbrella in the hand closer to the camera. When making the orb with the orbtool or hand torch, we had some thing laid on the ground to keep the centre. Now our own arm will serve as the center, meaning the rest of the body must not move or turn.

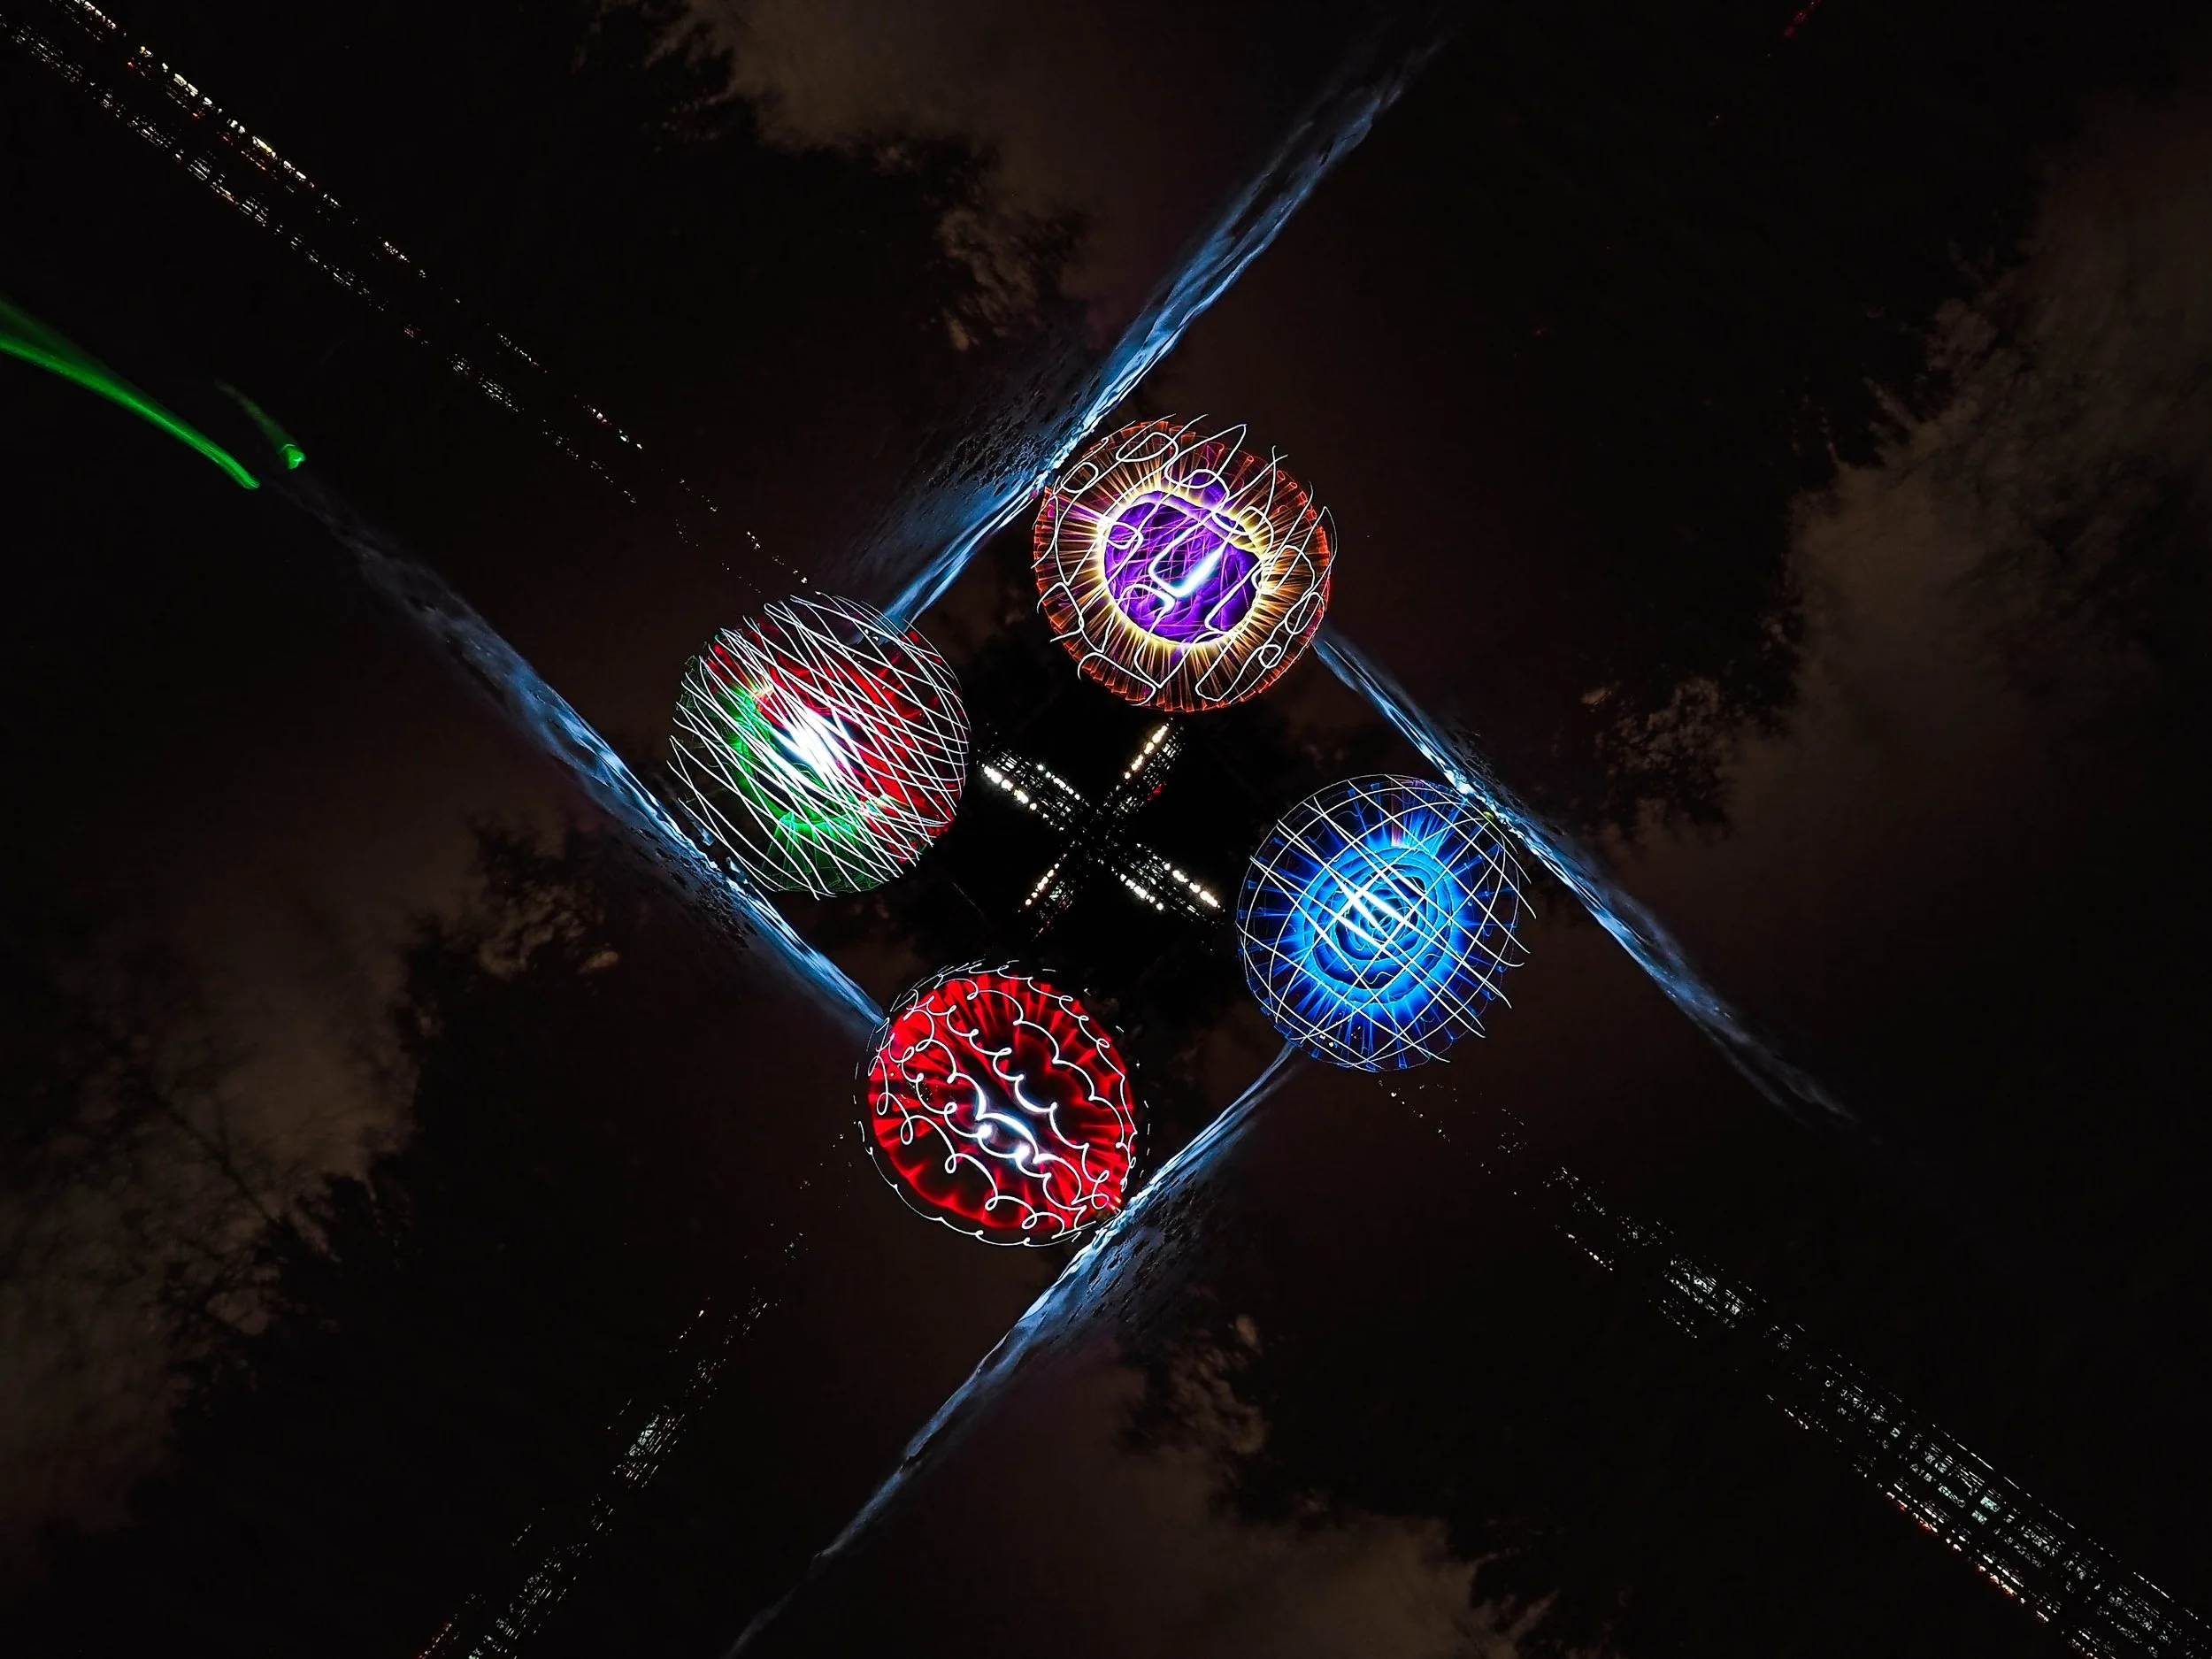
If we follow the above rules, then the creation of the ploughing is very simple. It consists in filling the hemisphere between us and the camera, i.e. the hand with the umbrella must trace 180° horizontally and vertically. In essence, the movement of the hands can be compared to painting a fence. Starting at the bottom of the leg, the outstretched hand is raised in front of you in a single line all the way up to the top center. From this point it will go down again, but not along the same line. This will accomplish moving the second line a little to the right and coming down. Again, move the line a little to the right and draw upwards. The number of lines should ideally be nine, with the middle one pointing directly at the camera. This will also give the effect of a compact sphere with no gaps. And so that we don't just have vertical lines drawn, there are small circular movements in the wrist. This creates a nice circular effect.

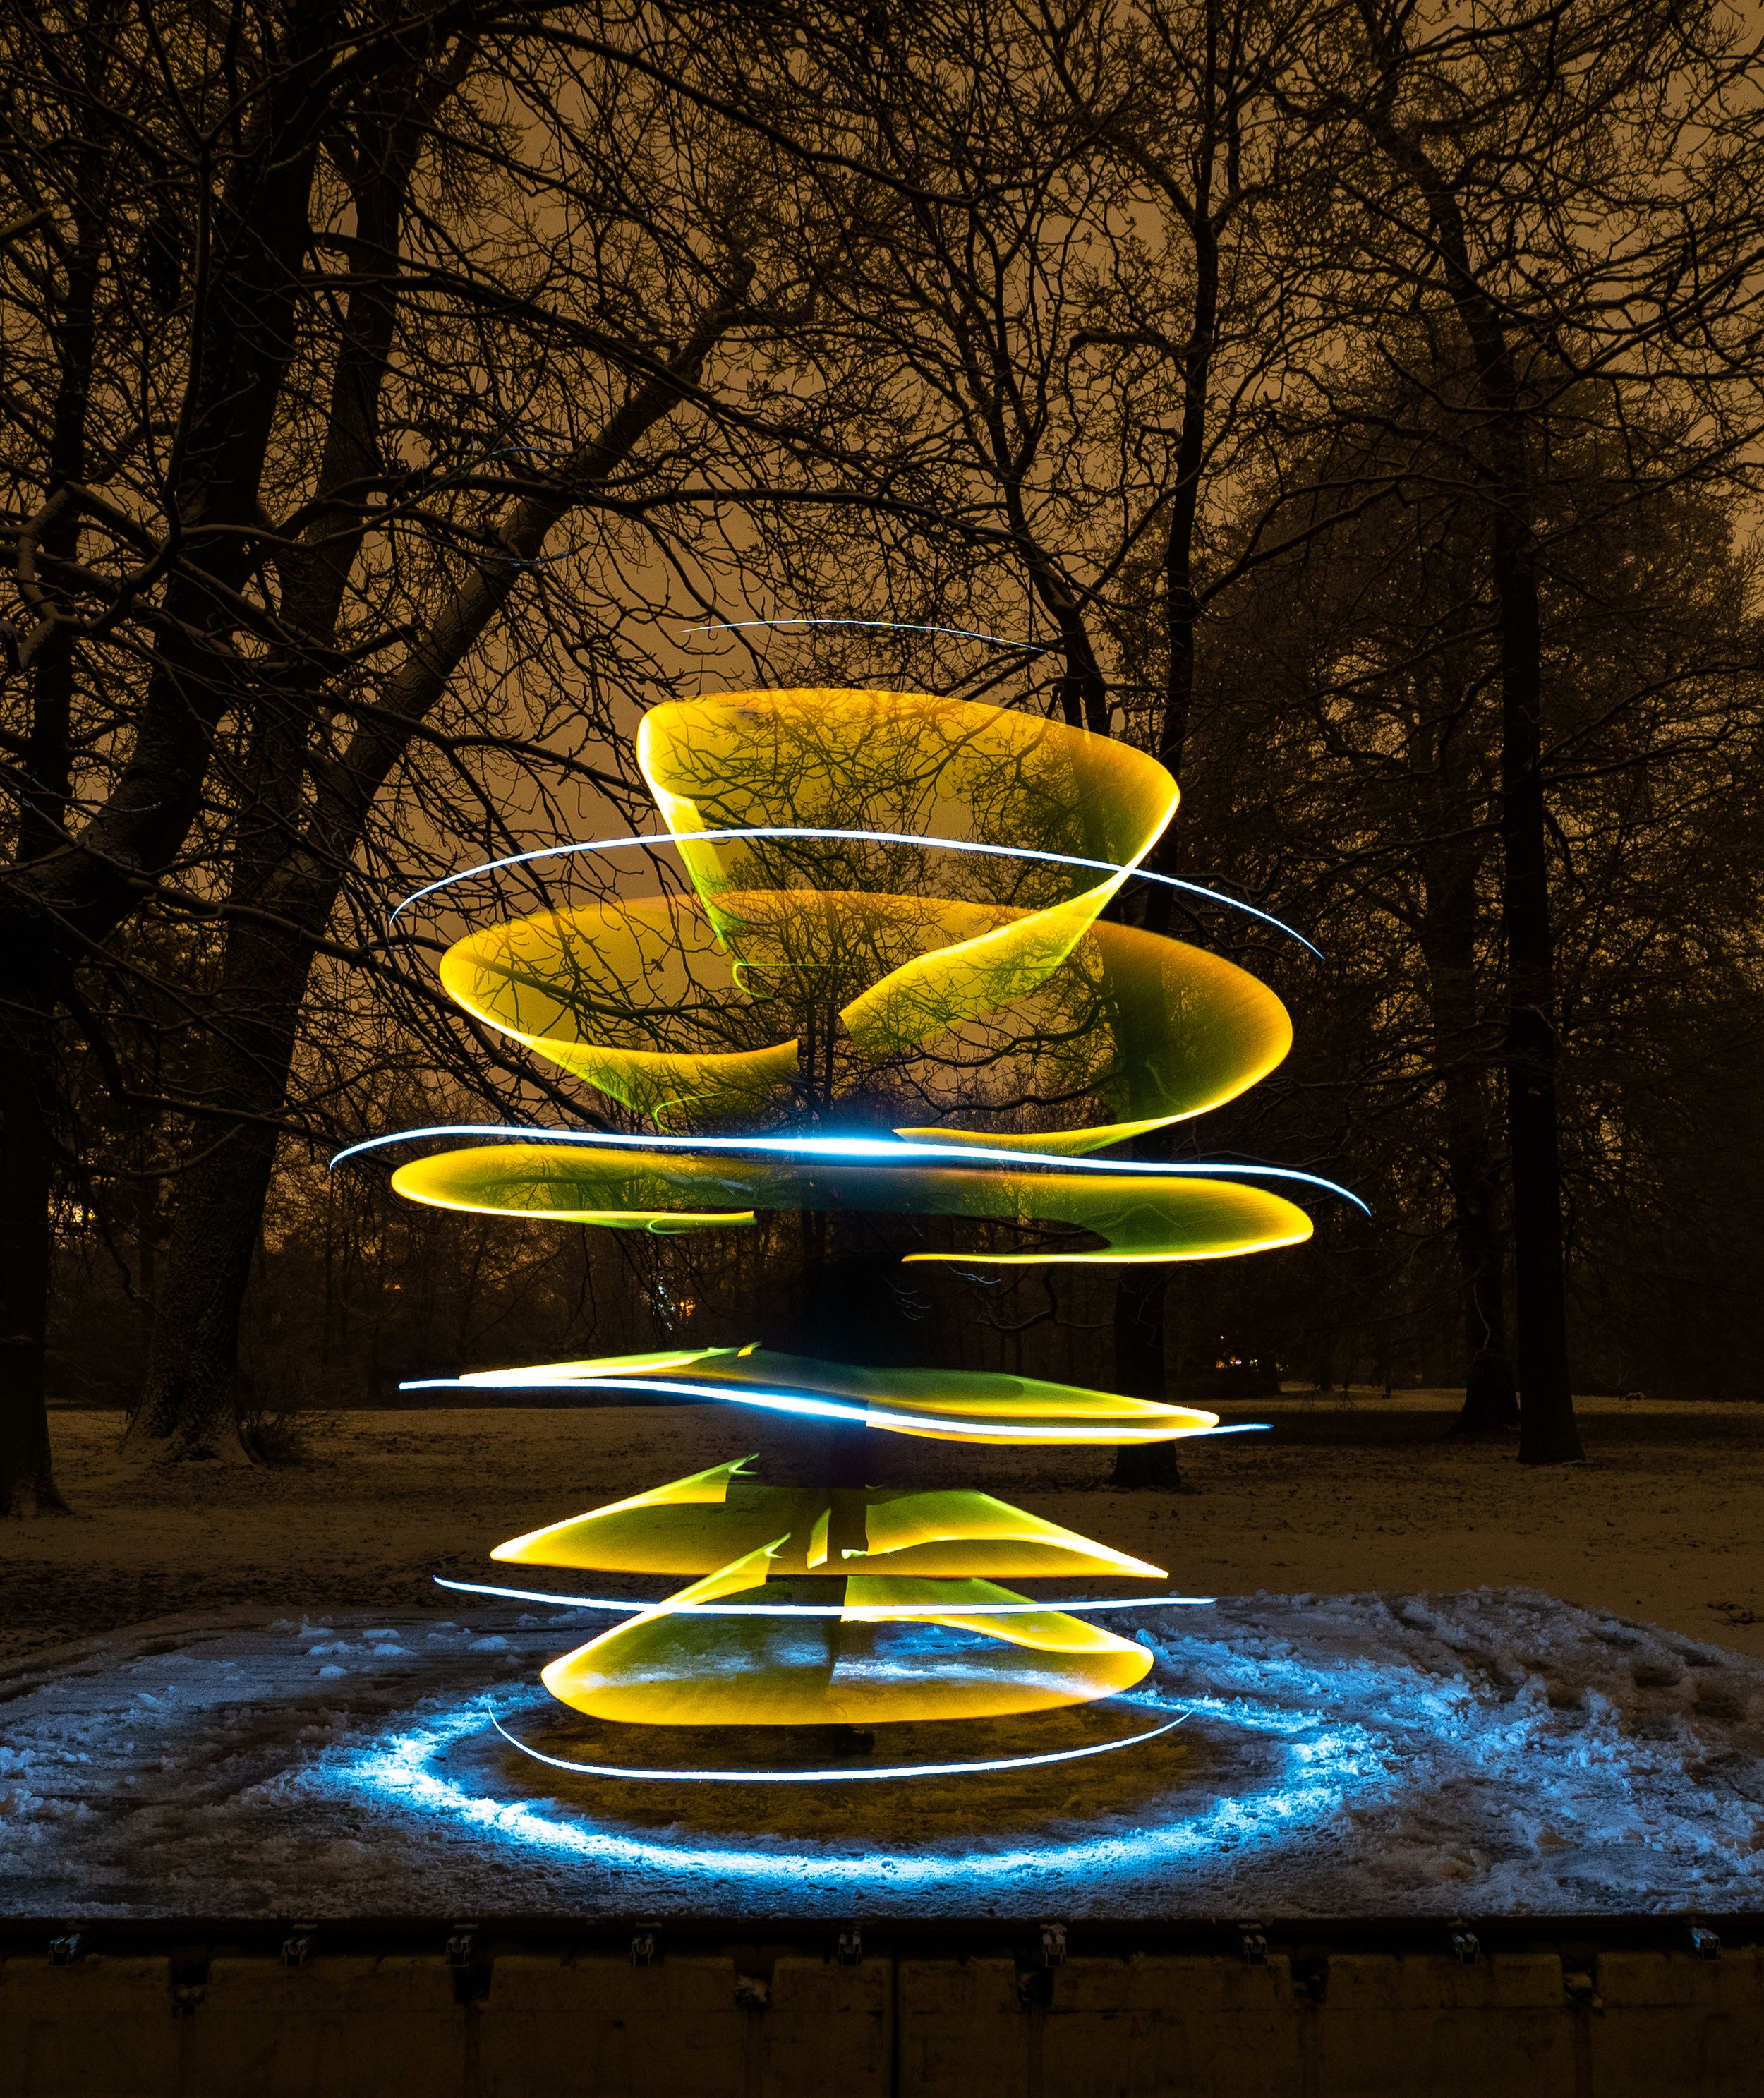
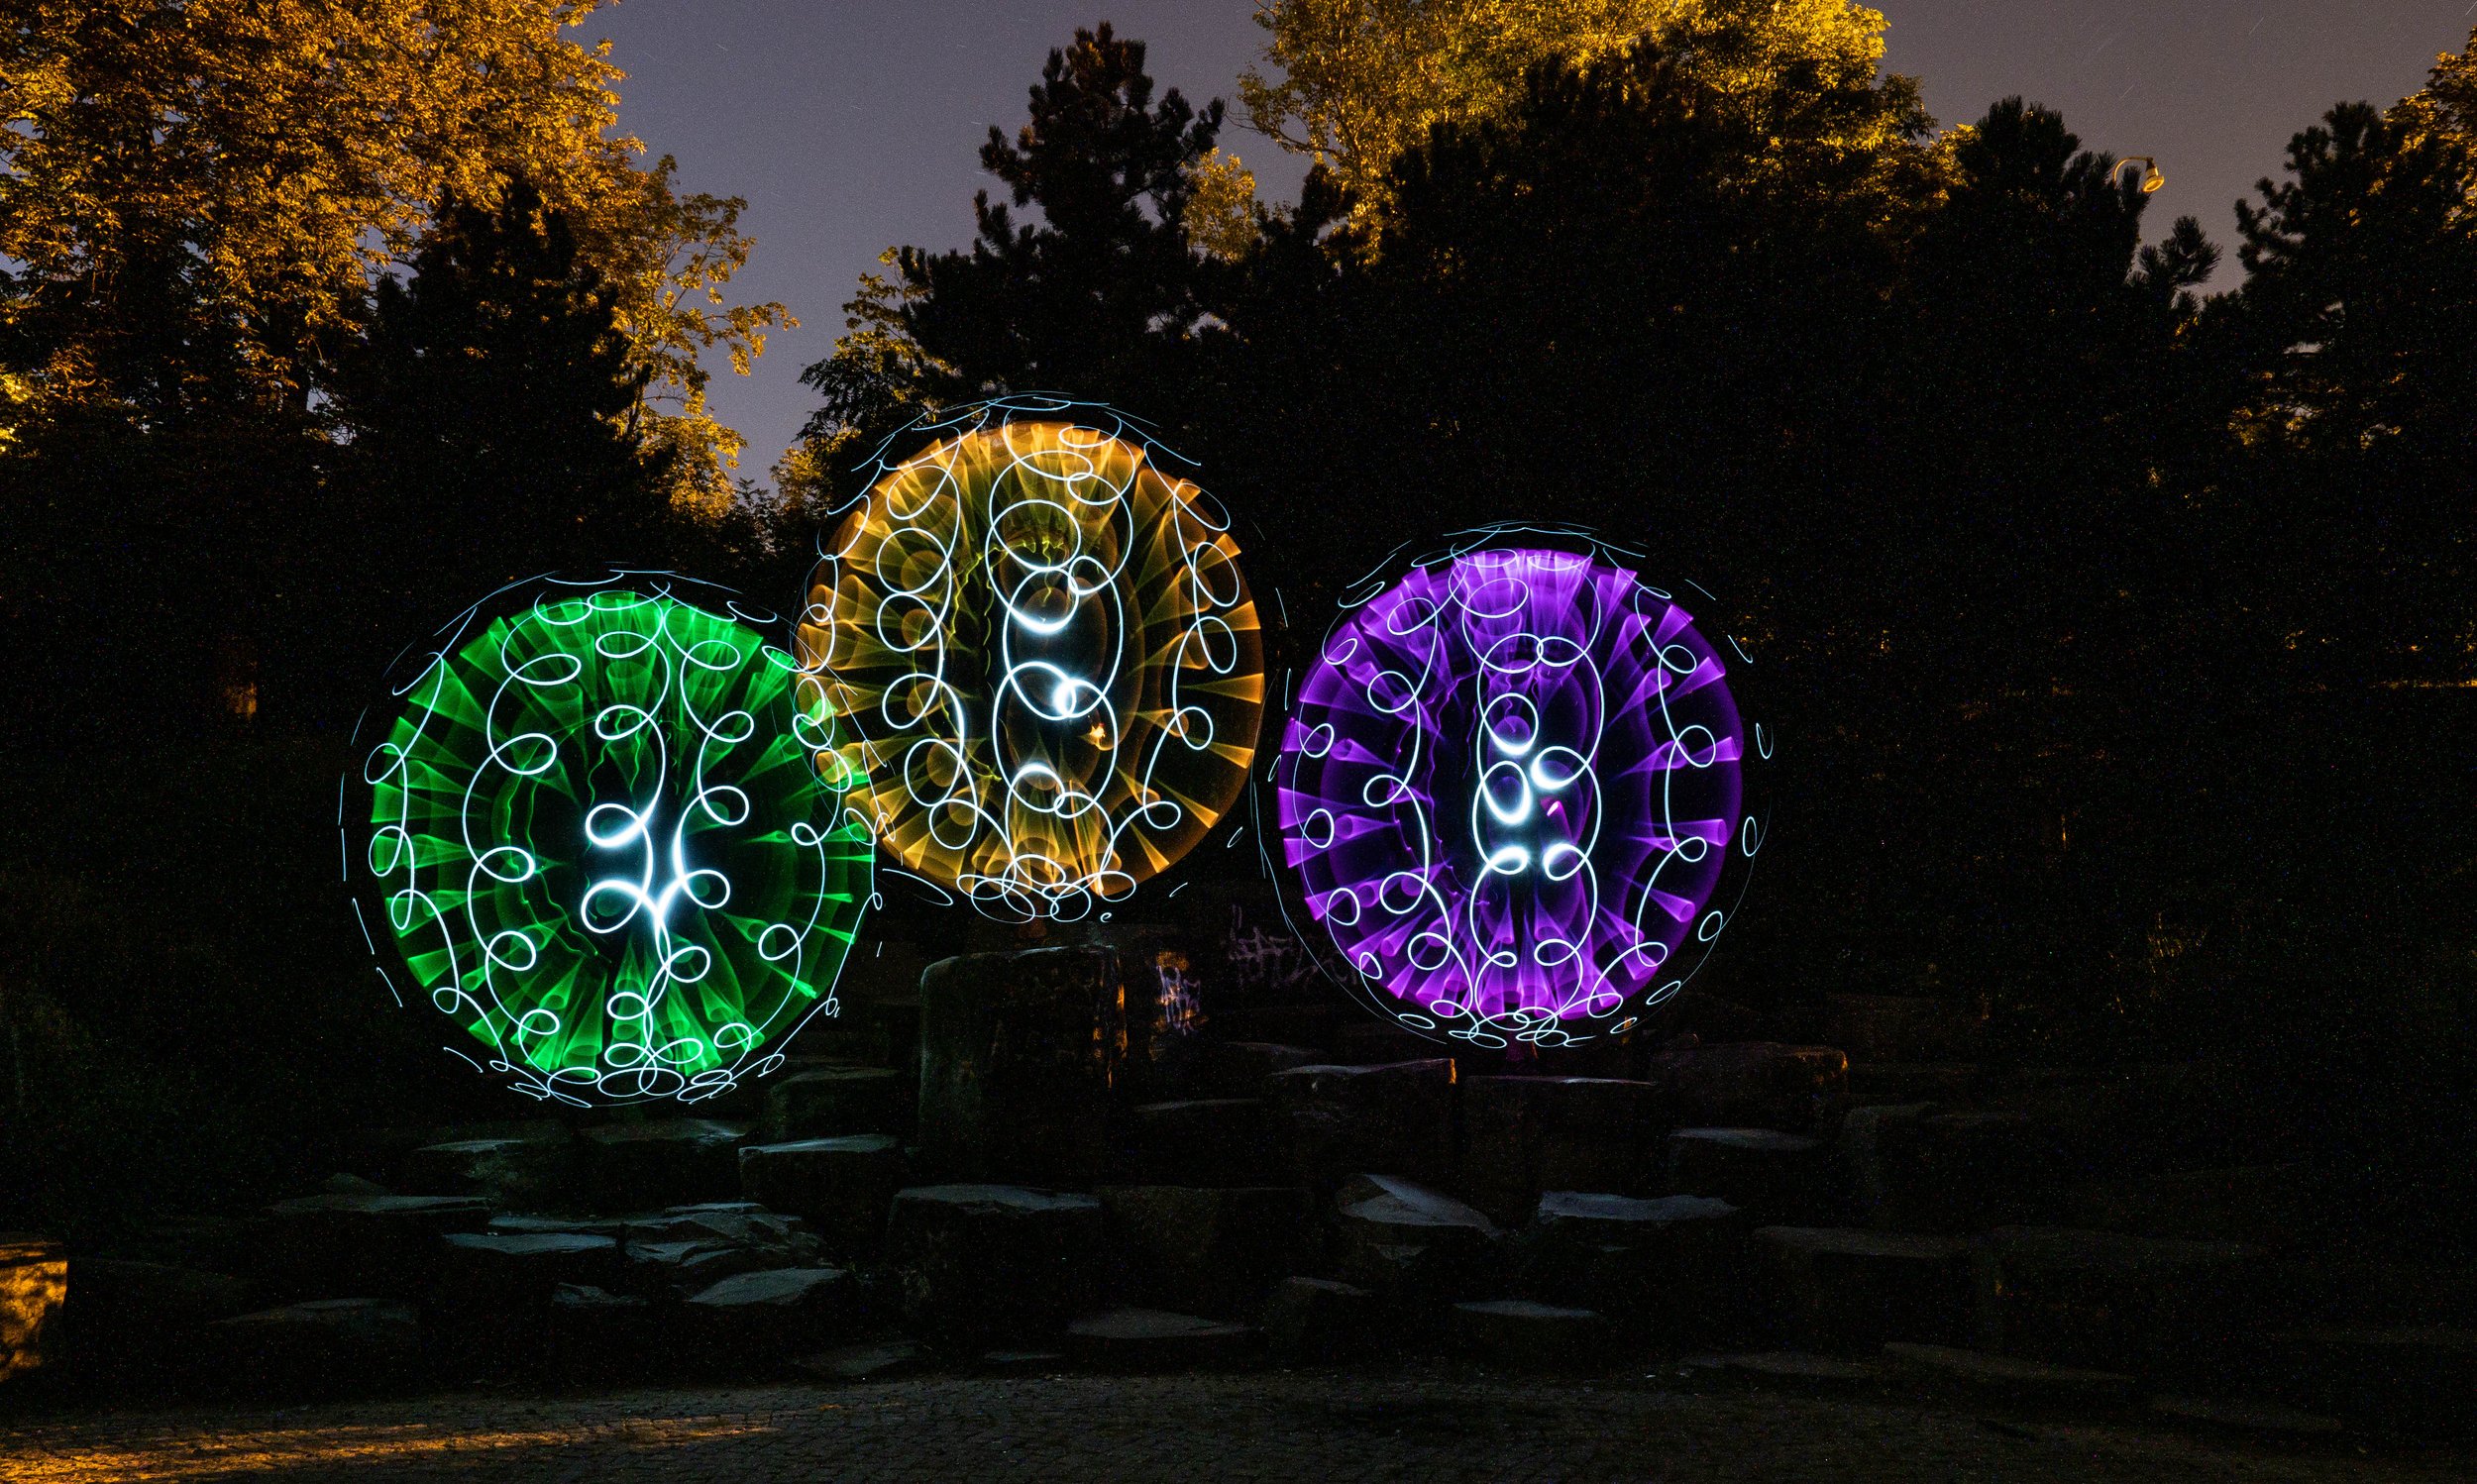
The important thing is to really keep the center of the plow by not moving the body and the whole movement is only in the shoulder. This tends to be flexible enough and if we turn the wrist with the thumb down to the ground, the shoulder opens up even more for the backward movement. If we have mastered everything, we can start playing with the whole creation of the orb using the umbrella. We can first create a colored center with different colors, holding the umbrella by the handle as standard. Here we can change the colours. Then we light only the white light at the end of the handle, grab the opposite and draw a sort of grid. Or we can create a coloured centre and then draw the grid diagonally forward for a different effect. There are lots of possibilities and it doesn't even have to be an ORB, but some other shape like a spiral or mushroom.